When faced with the challenge of a burst pipe, immediate action is crucial to prevent extensive water damage to your home. This article shines a light on the urgency of tackling burst pipe repairs and equips homeowners with the knowledge to execute quick and effective DIY plumbing repairs.
By embracing the do-it-yourself spirit, not only can you save on costly plumbing services, but you also gain invaluable home maintenance skills. We will guide you through recognizing the problem, ensuring safety, and executing the repair, providing you with all the necessary steps to address a burst pipe with confidence.
1. Identifying the Problem
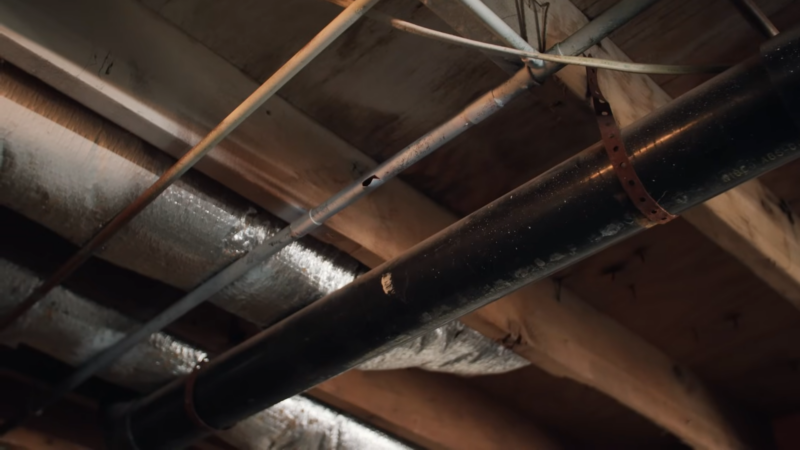
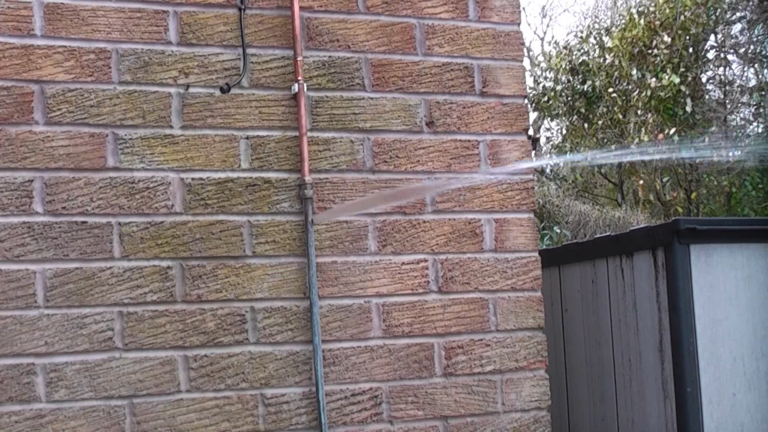
Recognizing the signs of a burst pipe is the first step in mitigating potential water damage. Symptoms include unexpected water marks on walls or ceilings, a noticeable drop in water pressure, or the sound of water running when no tap is in use.
Burst pipes commonly occur in areas susceptible to freezing temperatures or where pipes are under undue stress. Quick identification and action are paramount to minimizing the impact on your property. This section underscores the importance of vigilance and prompt response in the face of plumbing emergencies, setting the stage for a successful DIY repair.
2. Safety First
Before embarking on any plumbing repair, prioritizing safety is non-negotiable. Equip yourself with the necessary protective gear, such as gloves and eyewear, to safeguard against potential hazards.
Turn off all electrical circuits in areas affected by water to prevent electrocution risks. This preparation not only ensures your safety but also sets a professional tone for the task at hand, reflecting the seriousness with which you should approach DIY plumbing repairs.
Emphasizing safety underscores our commitment to not just effective, but also responsible DIY practices. When it comes to plumbing safety it is an area where you can always learn more.
3. Shutting Off the Water Supply
The immediate step following the identification of a burst pipe is to shut off the main water supply. This action prevents further water from flowing through the damaged pipe, thereby mitigating additional water damage.
Locating the main shut-off valve in advance and knowing how to operate it is essential for any homeowner. This knowledge can significantly reduce the response time in emergencies, illustrating the importance of preparedness in effectively managing home maintenance crises. The urgency of this step cannot be overstated, as it forms the foundation for a successful repair process.
4. Drain the Faucets
After shutting off the main water supply, the next critical step is to drain the remaining water from your pipes. Opening all faucets and flushing toilets in your home will release trapped water and pressure, preventing further leakage from the burst site.
This step is crucial for creating a dry environment for the repair and highlights the thorough approach required in DIY plumbing. By ensuring all water is drained, you minimize the risk of water damage during the repair process and prepare the plumbing system for a successful intervention.
5. Gather Essential Tools

Equipping yourself with the right tools and materials is pivotal for a successful DIY pipe repair. Essential items include pipe cutters, wrenches, pipe clamps, or repair sleeves, and sealant.
Having these tools at your disposal not only facilitates a smooth repair process but also emphasizes the importance of preparation in DIY tasks. This preparation mirrors professional plumbing practices, showcasing the homeowner’s dedication to executing the repair with the same level of seriousness and efficiency expected from experienced plumbers.
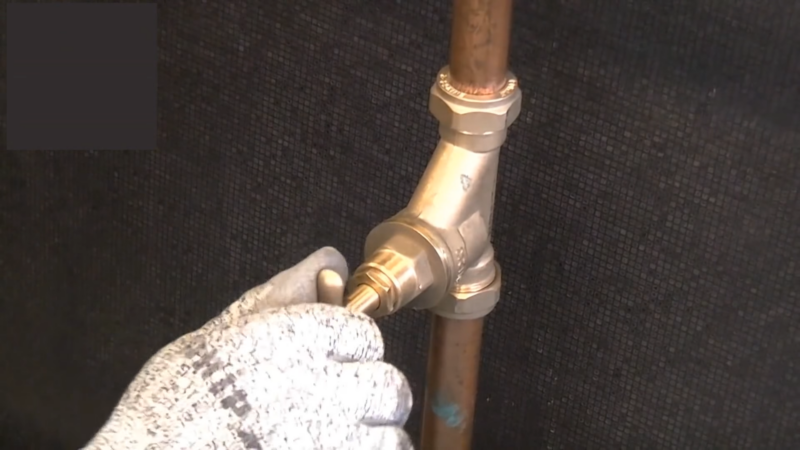
6. Isolate the Burst Section
Locating and isolating the burst pipe section is a critical step in the repair process. Careful inspection will reveal the extent of the damage, allowing for targeted repairs. This step requires a keen eye and patience, as the burst section may not always be immediately visible.
Once identified, isolating the damaged area ensures that the repair focuses precisely where it is needed, preventing unnecessary work on unaffected pipe sections. This approach not only saves time but also materials, highlighting the efficient and thoughtful execution of DIY plumbing repairs.
7. Cutting and Removing the Damaged Pipe
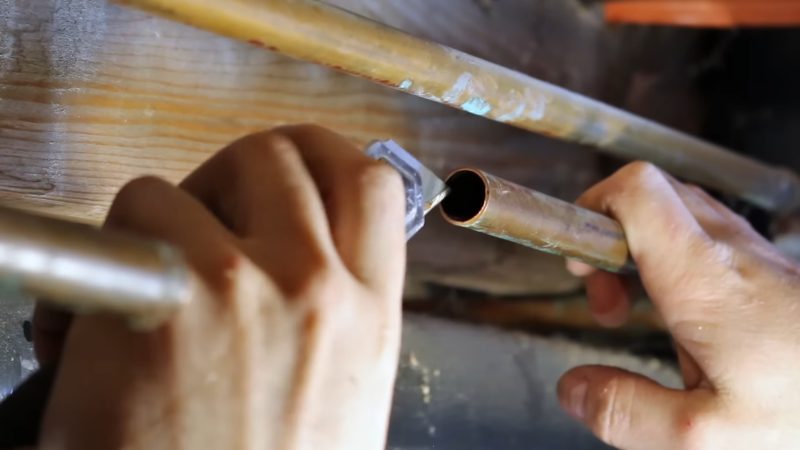
With the burst section isolated, the next step involves cutting out the damaged segment of the pipe. Precision and accuracy are vital during this process to ensure a clean removal, facilitating a seamless installation of the repair fitting.
This step may require careful measurement and a steady hand, as a clean cut is essential for the effectiveness of the subsequent repair. This process underscores the meticulous nature of DIY plumbing, where attention to detail can significantly impact the quality and durability of the repair.
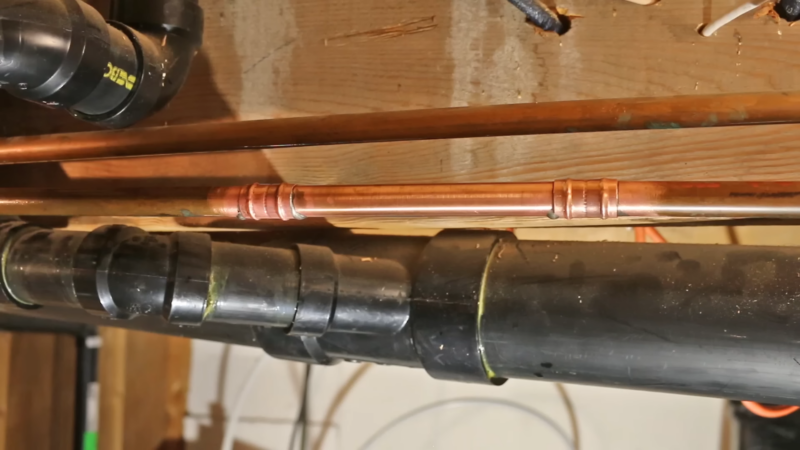
8. Installing a Pipe Clamp or Repair Sleeve
Installing a pipe clamp or repair sleeve over the damaged area is a straightforward yet effective method to seal a burst pipe. Following the manufacturer’s instructions, this step involves positioning the clamp or sleeve over the burst section and securing it in place.
This solution not only provides a quick fix but also emphasizes the accessibility of DIY plumbing solutions that can offer temporary or long-term resolutions to common plumbing problems. The simplicity of this step belies its importance in restoring the functionality of your plumbing system with minimal downtime.
9. Testing the Repair
After completing the repair, testing for leaks is imperative before fully restoring the water supply. Gradually turn on the main water valve and observe the repaired section for any signs of leakage. This cautious approach allows for immediate adjustments if necessary and ensures the repair’s integrity.
Testing not only verifies the success of your DIY repair but also reinforces the importance of a thorough and methodical approach to plumbing repairs, ensuring peace of mind and the long-term reliability of your plumbing system.
10. Additional Tips and Troubleshooting
Beyond the basic repair steps, offering additional tips and troubleshooting advice can empower homeowners to tackle a range of plumbing issues with confidence. Discussing common pitfalls and how to avoid them, or how to address unexpected complications, provides a comprehensive view of DIY plumbing.
This section reinforces the article’s aim to equip readers with a deep understanding of the repair process, enhancing their preparedness for future plumbing challenges.
Conclusion

This article has walked you through the critical steps for fixing a burst pipe, emphasizing the importance of quick action, safety, and precision. By following these guidelines, homeowners can effectively address plumbing emergencies, minimizing damage and restoring their home’s plumbing with confidence.
Remember, the key to successful DIY plumbing lies in preparation, the right tools, and a methodical approach. Encourage taking immediate action at the first sign of a burst pipe, underscoring the significance of prompt repairs in maintaining the integrity of your home’s plumbing system.
With these insights, you are well-equipped to tackle burst pipe repairs, ensuring the safety and comfort of your home.